Jun 11, 2024
The Azure AD portal– Planning and Managing Azure AD Identities
The Azure AD portal is the other interface that is used to create and manage groups. As with the user creation options, the Azure AD portal provides a slimmed-down feel without the wizard experience of the Microsoft 365 admin center.
To create and manage groups in the Azure AD portal, follow these steps:
- Navigate to the Azure AD portal (https://aad.portal.azure.com) and select Groups.
- With the default All groups navigation item selected, click New group.
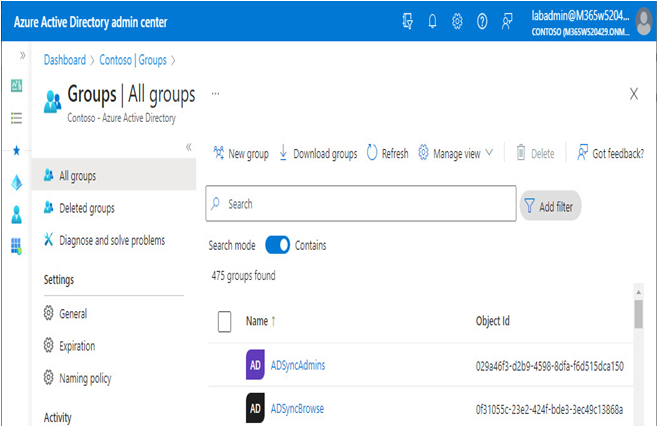
Figure 5.15 – Azure AD all groups
- On the New Group page, specify either Security or Microsoft 365 for Group type, enter a name in the Group name field, and optionally, provide a description in the Group description field. If you’ve selected Microsoft 365 as the group type, you will also be required to enter Group email address. The security groups created in the Azure portal are not mail-enabled.
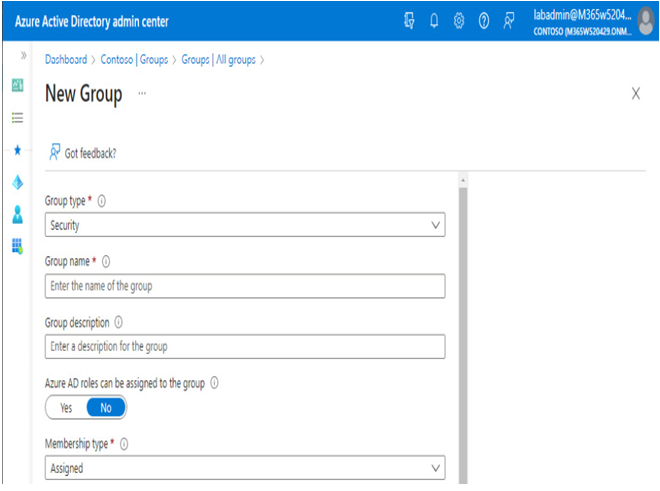
Figure 5.16 – New Group page
- You can choose whether or not Azure AD security roles can be assigned to the group. If you select Yes, then the group must have an assigned membership.
- Under Membership type, you can select Assigned, Dynamic User, or Dynamic Device (if it is a security group). If it is a Microsoft 365 group, you can choose from Assigned or Dynamic user. Security groups with assigned membership can have all supported object types, but dynamic groups are constrained to a single object type.
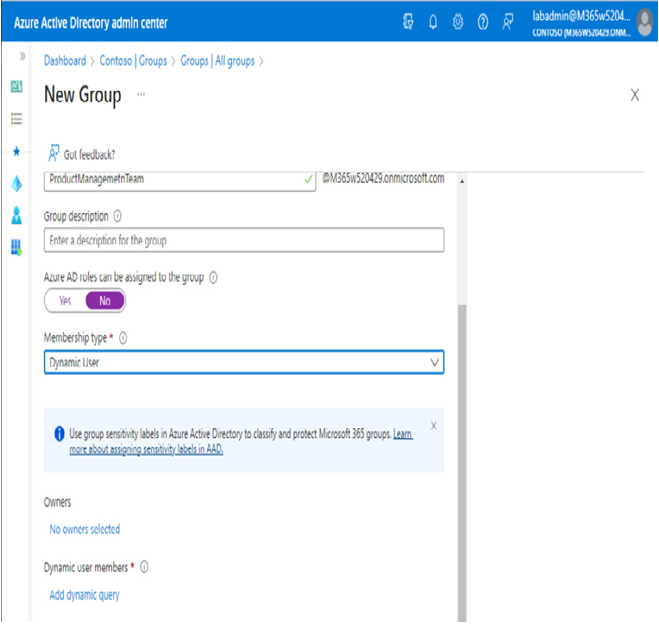
Figure 5.17 – Creating a new dynamic group
- If you select a group with an Assigned membership type, you can add Owners and Members. If you select a group with either of the dynamic membership types, you must add a dynamic query, as shown in Figure 5.17.
- To configure a dynamic query, click Add dynamic query.
- On the Configure Rules tab of the Dynamic membership rules page, configure an expression that represents the users or devices you want to have included in the group. For example, to create a user membership rule that looks for the value Engineering in either the jobTitle or department user attributes, select the appropriate property, select Equals or Contains under Operator, and then enter the value Engineering.
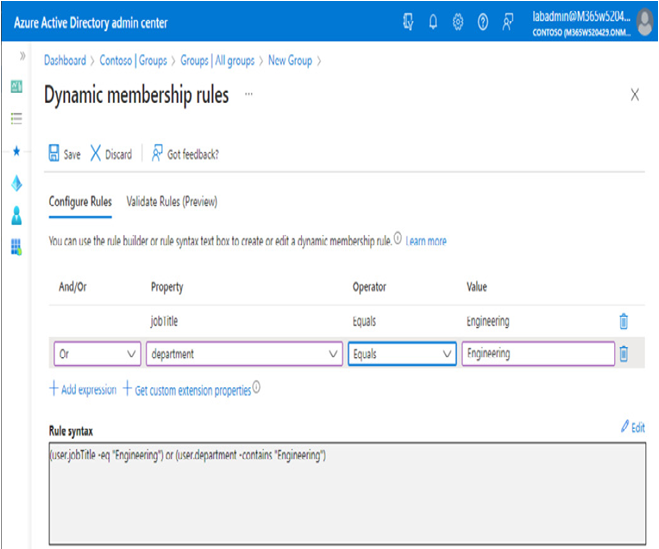
Figure 5.18 – Creating a dynamic membership rule
- You can view the construction of the rule in the Rule syntax output box. If necessary, you can edit the rule free-form to create a more complex rule type.
- You can select the Validate Rules (Preview) tab and add users you think should be in-scope or out-of-scope to verify that the rule is working correctly. Click Add users and then select users from the picker. In this example, Aamir E Cupp and Abagael R Rauch were selected. Aamir’s job title is Manager and his department is Sales, so the expected result is that he is not included in the group. Abagael’s job title is Scientist but her department is Engineering. Based on the way the query is constructed, she is included in the group. See Figure 5.19.
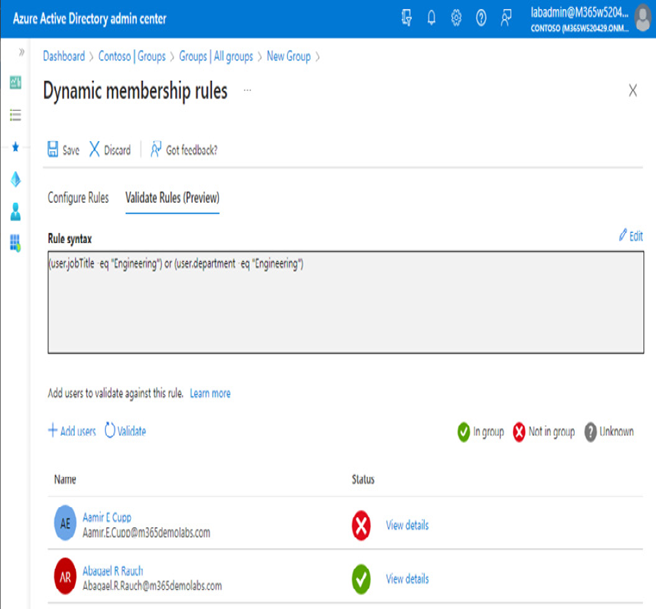
Figure 5.19 – Validating the dynamic membership rule
- When you have finished editing the rule, click Save.
- Click Create to create the new group.
Using the Azure AD portal, you can also update the membership rules for existing groups or change a group’s membership from Assigned to Dynamic by selecting the group and then editing the details in its Properties menu, as shown in Figure 5.20.
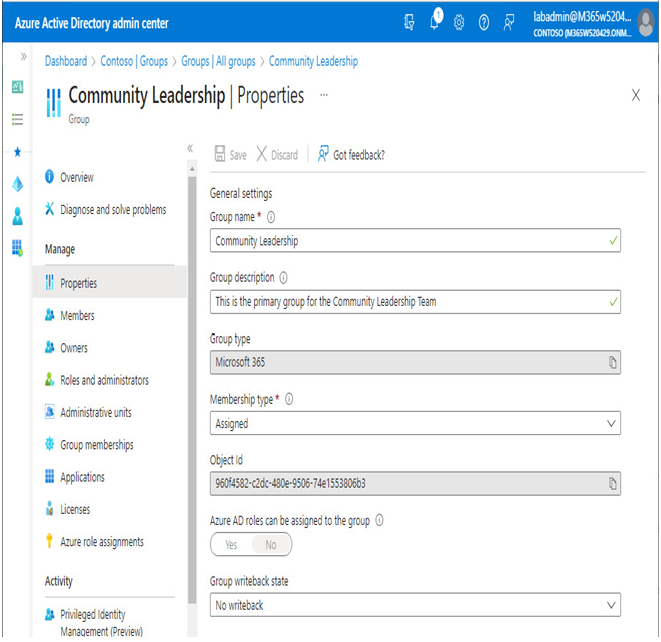
Figure 5.20 – Editing a group
If you change a group from Assigned to Dynamic membership, you’ll need to create a query. It’s important to note, though, that you cannot change a group’s type (for example, from Security to Microsoft 365) or whether a group is eligible for Azure AD role assignment—those options can only be selected when creating a group.
NOTE
Microsoft Entra is the new umbrella product that covers Microsoft identity management and governance. Currently, the Microsoft Entra admin center (https://entra.microsoft.com) maps to specific blades or tabs inside the Azure portal and doesn’t really display anything new. Over the next year or two, anticipate that Microsoft will begin emphasizing the Entra admin center experience over the Azure portal experience for identity management tasks.
Figure 5.21 – Entra admin center
More Details