Jan 23, 2024
Creating and managing cloud users– Planning and Managing Azure AD Identities
From an Azure AD perspective, cloud users are the easiest type of object to understand and manage. When you create an Azure AD or Microsoft 365 tenant, one of the first things you set up is your administrator user identity (in the form of [email protected]). This identity is stored in the Azure AD directory partition for your Microsoft 365 tenant. When we talk about Azure AD cloud users, we’re talking about users whose primary source of identity is in Azure AD.
Exam tip
Cloud users can be assigned to any domain that is verified in the Microsoft 365 tenant with a single caveat—the domain must be in managed mode. If a domain has been federated (such as with AD FS or PingFederate), users can only be assigned that domain when they are provisioned in the on-premises system.
The initial domain (or tenant domain) will always be a cloud-only domain since Azure AD will always be the source of authority for it. When you add domains to a tenant, the domains are initially configured as managed—that is, Azure AD is used to manage the identity store.
One benefit of configuring cloud-only users is that there is no dependency on any other infrastructure or identity service. For many small organizations, cloud-only identity is the perfect solution because it requires no hardware or software investment other than a Microsoft 365 subscription. Correspondingly, a drawback of cloud-only users is the lack of integration with on-premises directory solutions.
Exam tip
As a best practice, Microsoft recommends maintaining at least one cloud-only account in case you lose access to any on-premises environment.
The easiest way to provision cloud users is through the Microsoft 365 admin center (https://admin.microsoft.com). To configure a user, expand Users, select Active Users, and then click Add a user. The wizard, shown in Figure 5.1, will prompt you to configure an account.
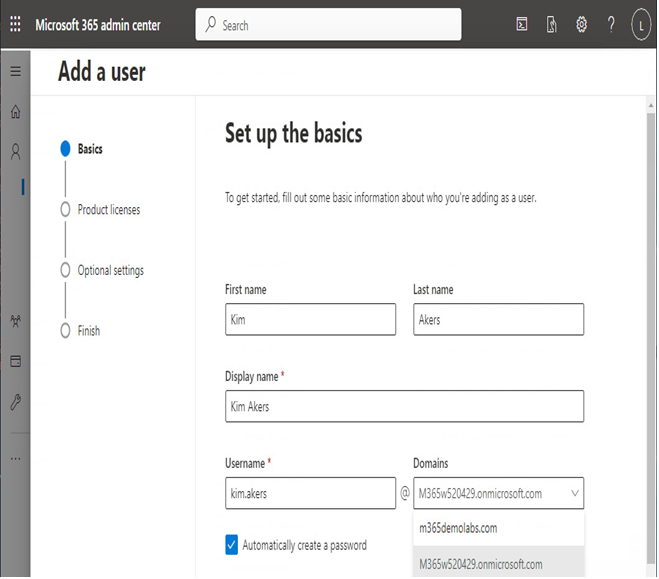
Figure 5.1 – Adding a new cloud user
You can configure the name properties for a user as well as assign them any licenses and a location through the Add a user wizard’s workflow, as shown in Figure 5.2:
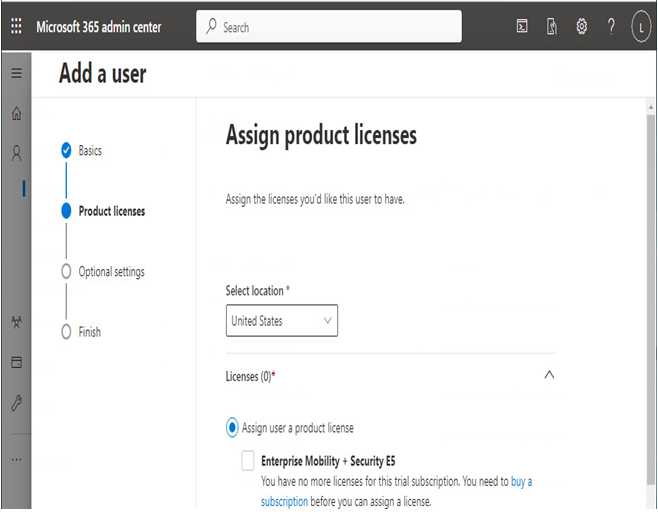
Figure 5.2 – Assign product licenses page
On the Optional settings page, you can also configure additional properties such as security roles, job title and department, addresses, and phone numbers, as shown in Figure 5.3.
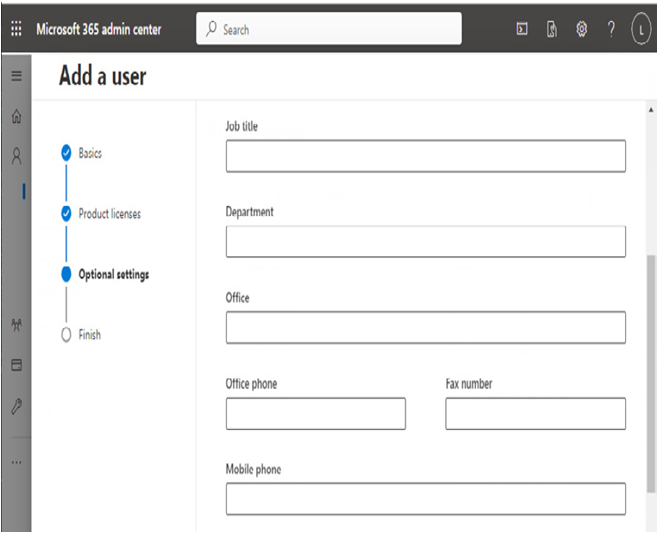
Figure 5.3 – Add a user profile information
You can also add users through the Azure AD portal (https://aad.portal.azure.com). The Azure AD portal is arranged much differently from the Microsoft 365 admin center, due largely to the number of different types of resources and services that can be managed there. There are several differences in managing users and objects between the two interfaces; the Microsoft 365 admin center is a much more menu-driven experience, prompting administrators to configure common options and features inside the provisioning workflow.
Once you’ve logged in to the Azure AD portal, select Users and then select New user. The interface, shown in Figure 5.4, offers the opportunity to populate similar fields to those in the admin center.
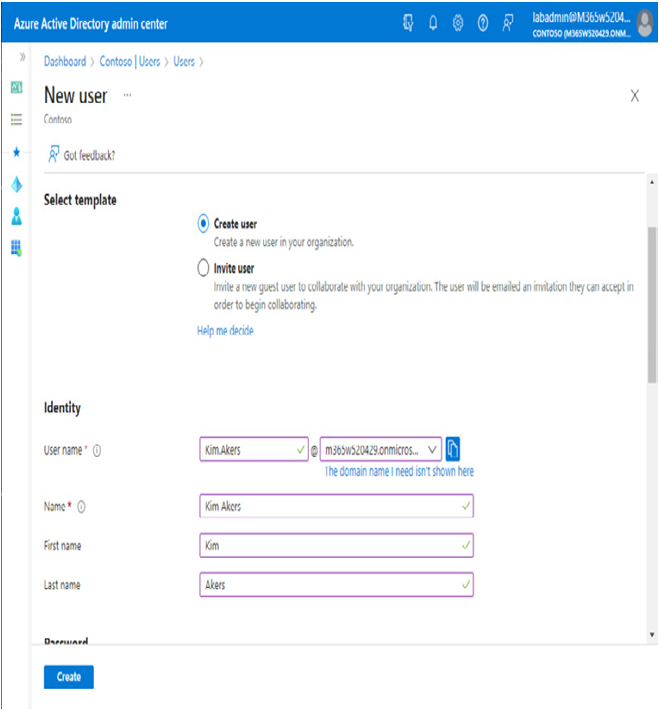
Figure 5.4 – Creating a user through the Azure AD portal
Most organizations that are using Azure from a cloud-only identity perspective will likely provision objects inside the Microsoft 365 admin center.
More Details